


The fastest way to transfer photos to computer is a data-capable USB cable. Connect your unlocked phone, then use the Photos app on Windows or Mac to import your pictures. On Android, choose File Transfer mode and copy the DCIM folder instead. Prefer no cables? Turn on cloud storage backup, or use AirDrop or Quick Share for smaller batches.
Why You Should Transfer Photos to Computer Right Now
Most of us only think about backups after something goes wrong. A cracked screen, a stolen bag, or a "Storage Full" warning is usually the wake-up call, and by then it can feel like a scramble.
Moving your pictures to a computer gives you a safer copy, more room on your phone, and a bigger screen for editing. Here's what you gain:
Free up phone storage, so there's finally room for that update
A safer photo backup if your phone is lost, stolen, or broken
Full-size original quality files for printing and photo editing. If you edit often, calibrate your monitor so your colors look right.
Which Method Should You Use? A Quick Comparison
Not sure where to start? This side-by-side table helps you pick the right route in about ten seconds, so you don't waste time on a method that doesn't fit your phone or computer.
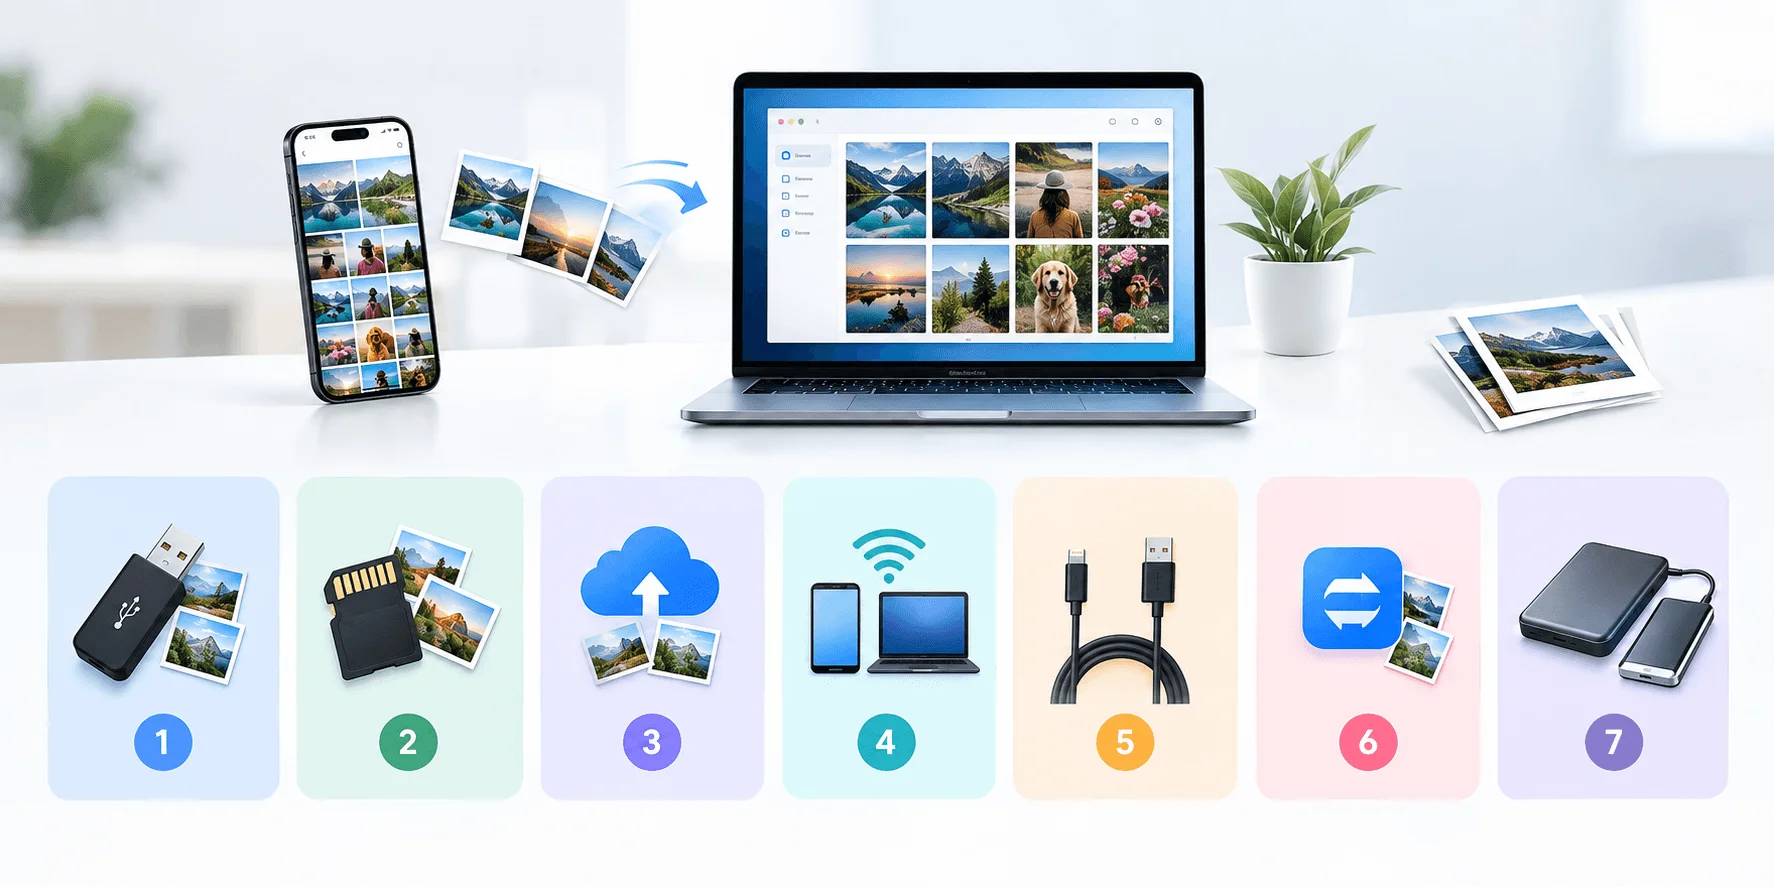
I've listed the methods in the same order they appear in this guide. Find your device, check the cable and internet columns, and jump straight to that section.
Method | Best for | Cable needed? | Internet needed? | Cost |
|---|---|---|---|---|
1. USB + Windows Photos app | iPhone to Windows, big batches | Yes | No | Free |
2. AirDrop, Photos or Image Capture | iPhone to Mac | AirDrop: no. Import: yes | No (Wi-Fi and Bluetooth for AirDrop) | Free |
3. Android USB File Transfer | Android, large libraries and videos | Yes | No | Free |
4. Quick Share | Android to Windows, a few photos | No | No (Wi-Fi and Bluetooth nearby) | Free |
5. Windows 11 File Explorer | Android on Windows 11 | No (uses Phone Link pairing) | Pairing required | Free |
6. Cloud storage | Automatic, hands-off syncing | No | Yes | Free tier, paid for more |
7. SD card reader | Cameras, drones, memory cards | Card reader | No | Low-cost reader |
Before You Start: 3 Quick Checks That Save Time
Nothing kills the mood like plugging in your phone and staring at an empty folder. Usually, the culprit is something tiny, and it takes seconds to fix once you know where to look.
Run through this short checklist first, and you'll dodge most of the common headaches before they start:
Use a data cable. Google notes that not every USB cable can transfer files, so a charge-only cable is a classic culprit.
Unlock your phone. Microsoft says your PC can't find a device that's locked.
Know where your photos live. Are they on the phone, or only in the cloud? This matters a lot for iPhone users, as you'll see next.
How to Transfer Photos From iPhone to Computer
iPhone owners have several official routes, and all of them work well once you know the tricks. Apple's current guide for Windows points you to the Apple Devices app, so you don't need to follow older, iTunes-based instructions for this job.
Below, I'll cover the cable method for Windows first, then the Mac options. Choose the one that matches your computer, and don't overthink it.
Method 1: USB Cable and the Windows Photos App
This is my recommendation for big batches. It's fast, it doesn't need Wi-Fi, and it keeps your original quality files intact, which matters if you plan to edit or print them later.
Apple's official transfer guide says to install the Apple Devices app from the Microsoft Store first. After that, it's just a few clicks:
Install the Apple Devices app from the Microsoft Store.
Connect your iPhone with a USB cable and unlock it.
Tap Trust on your iPhone when the prompt appears.
Open the Photos app on your PC and click Import.
Choose your iPhone, pick your photos, select a destination folder, and start the import.

One warning: the Photos app includes a delete items after import checkbox. Leave it unticked until you've confirmed everything copied over.
The iCloud Photos Trap (And How to Avoid It)
Here's where things get sneaky. If you use iCloud Photos, your iPhone may only hold small previews instead of the full files, so a cable import can quietly give you less than you expected.
Apple says you must download the full-resolution originals to your iPhone before importing to a PC. Skip this step, and you'll end up with disappointing results. Here's the fix:
Open your iPhone's Photos settings and choose Download and Keep Originals.
Stay on Wi-Fi until the download finishes.
Run Method 1 again.
Bonus tip: if Windows struggles with HEIC files, open Settings, tap Camera, tap Formats, and choose Most Compatible. Your iPhone will then capture JPEG and H.264 from now on. Not sure which format suits you best? Our JPG vs PNG guide explains how common image formats differ.
Method 2: AirDrop, Photos, or Image Capture on Mac
Mac users get the smoothest experience, because everything is built in. You can send a handful of pictures instantly or import your entire camera roll, depending on how many photos you're moving.
Small batch? Use AirDrop. Big library? Use a cable and the Photos app. Here's how to transfer photos from iPhone to computer on a Mac with AirDrop:
Turn on Wi-Fi and Bluetooth on both devices, and keep them within 30 feet.
On your iPhone, open Photos, tap Select, and choose your pictures.
Tap Share, then AirDrop, then tap your Mac.
Accept the transfer on your Mac if it asks.
Got thousands of photos? Connect a cable, open Photos on your Mac, and click Import All New Photos. Apple also lists Image Capture as an option if you'd rather save images straight into a folder of your choice.
How to Transfer Photos From Android to PC
Android gives you more freedom than iPhone, which is great. It also gives you more menus, which is less great, especially when every phone brand words things a little differently.
Don't worry, though. I'll walk you through three reliable ways to transfer photos from Android to PC: a cable, a wireless app, and a Windows 11 feature. Each one takes just a few minutes.
Method 3: USB File Transfer Mode
The cable method is boring, but boring works. It's also the best pick when you're moving a huge pile of videos, since nothing beats a direct connection for speed or reliability.
Here's Google's official process in plain English:
Connect your phone to your PC and unlock it.
Tap the "Charging this device via USB" notification.
Under "Use USB for," choose File Transfer.
Open File Explorer on your PC and find your phone.
Open the DCIM folder, then the Camera folder.
Copy your photos and paste them into a folder on your PC.
Want the originals gone afterward? Use Cut instead of Copy. Just double-check the copy first.
On a Mac, Popular Science explains you'll need Google's free Android File Transfer app. Your pictures usually sit in the DCIM folder there too.
Method 4: Quick Share for Windows
No cable handy? No problem. Google's Quick Share lets you transfer photos wirelessly between Android and Windows, and the transfers are encrypted, so your pictures stay private.
It's ideal when you only need a few pictures and don't feel like hunting for a cord. Here's the setup:
Download Quick Share for Windows. You'll need a 64-bit version of Windows 10 or 11.
Open the app and sign in.
Make your PC visible to your phone.
On your phone, select photos, tap Share, tap Quick Share, and choose your PC.
Heads-up: Samsung PCs use Samsung's own Quick Share app instead, so check which one you have.
Method 5: Windows 11 File Explorer
Here's a change worth knowing about. Microsoft says the Photos feature is moving from Phone Link to File Explorer on Windows 11.
That means your phone's pictures can appear alongside your other files, with copy, paste, and drag-and-drop. Microsoft also says you can reach more than the camera roll, including videos and other folders. Here's how to turn it on:
Pair your Android phone with your PC using Phone Link.
Open Settings, then Bluetooth & devices, then Mobile devices.
Select Manage mobile devices and switch on Show mobile device in File Explorer.
Open File Explorer and browse your phone's photos.
Older Phone Link guidance says it only shows recent photos and skips videos. Availability of the newer File Explorer view can vary by device and update, so check Microsoft's page if you don't see the option.
Transfer Photos to Computer With Cloud Storage
Cables are annoying. Wouldn't it be nice if your pictures just showed up on your computer by themselves, without you lifting a finger?
That's exactly what cloud storage does. You turn on automatic backup once, and your photos follow you around. The trade-off is that you need enough storage space and a decent internet connection, especially for the first big upload.
Method 6: iCloud, Google Photos, or OneDrive
All three services work in a similar way. Your phone uploads pictures in the background, and you download them on your computer whenever you like, so nothing depends on a cable.
Which one should you pick? Use whichever service your phone already uses. Here's how each one works, step by step.
iCloud Photos on Windows
If you're an iPhone user with iCloud Photos already on, this one is nearly effortless. Your pictures are already in the cloud, so you only need to pull them down to your PC.
Here's the Windows route, based on Apple's iCloud for Windows guide:
Install iCloud for Windows and sign in with your Apple Account.
Turn on Photos.
Open File Explorer and click iCloud Photos.
Double-click a photo to download it. Hold Ctrl to select several.
Prefer the browser? Go to iCloud.com/photos. Apple says you can select up to 1,000 items at a time there, so larger libraries take a few rounds.
Google Photos and Google Takeout
Google Photos works on both iPhone and Android, which makes it perfect for mixed households. Make sure backup is turned on in the app first, or nothing will be waiting for you online.
For a few pictures, go to photos.google.com, select a photo, click More, and choose Download. For your whole library, use Google Takeout:
Open Google Takeout and click Deselect all.
Scroll down, tick Google Photos, and click Next step.
Choose your delivery method, file type, and archive size.
Click Create export, and wait for the email.
Download every archive and extract them into one folder.
Two quirks are worth knowing. Extracted files can include JSON sidecar files. Also, the date Windows shows may be the download date, not the day you took the photo. The real date stays in the embedded EXIF metadata.
OneDrive Camera Upload
OneDrive is handy if you're already deep in the Microsoft world. Windows machines usually have it installed, so setup is quick and you rarely need to download anything extra.
According to Microsoft's OneDrive help, you turn on Camera Upload in the phone app. Then:
Install the OneDrive app on your phone and sign in.
Open Settings and switch on Camera Upload.
On your PC, open the Photos app and go to the OneDrive tab.
Sign in with the same account, and your pictures appear.
Transfer Photos From a Camera or SD Card
Shooting with a real camera, a drone, or an action cam? Then you're working with memory cards, and the process looks a little different from a phone, though not harder.
In fact, it's simpler. A card reader skips the phone completely and gives you a fast, direct path to your files, with no pairing, no prompts, and no cloud.
Method 7: Use an SD Card Reader
Card readers are cheap, quick, and don't care what brand of camera you own. Most laptops also have a built-in slot, so you might not need to buy anything at all.
On Windows, Sony's guide says to use AutoPlay's Import pictures option, or open File Explorer and browse the card's DCIM folder.
On a Mac, follow Apple's steps:
Insert the card, or connect a card reader.
Open Photos and choose File, then Import.
Click Import All New Photos, or select specific ones.
Eject the card when it's done.
How to Check Your Transfer Worked Before You Delete Anything
Here's the step almost every guide skips. Once your photos land on the computer, it's tempting to wipe your phone right away and enjoy the free space.
Please don't, at least not yet. This matters even more if you plan to factory reset your iPhone, because a reset erases everything on the device. A quick check takes two minutes and protects you from the one mistake you can't undo:
Compare counts. Note how many photos are on your phone, then check the number in your computer's folder.
Open a few files. Pick three at random, including one video, and make sure they open and play.
Check file sizes. Tiny files can mean you copied previews instead of originals, especially with iCloud.
Make a second copy. Follow the 3-2-1 rule below before you clear your phone.
Fixing the Most Common Photo Transfer Problems
Sometimes things go sideways. Your phone doesn't show up, your pictures won't open, or your library looks messy after the import, and it's easy to feel stuck.
Take a breath. These three problems cause most of the frustration, and each has a simple fix. Let's tackle them one at a time.
My Computer Doesn't Recognize My Phone
This is the number-one complaint, and it's almost always a cable, a port, or a permission prompt. Fortunately, the fixes are quick, and you can usually solve it without any special software.
Apple's troubleshooting page suggests this order:
Check your cable. It must support both data and charging.
Try a different USB port or cable.
Tap Trust on your iPhone if the alert appears.
Update iOS or Android, then restart both devices.
Still nothing? Try another computer. That tells you whether the problem is your phone or your PC. Curious how phones and cameras talk to computers? The Picture Transfer Protocol is one of the standards behind it.
HEIC Photos Won't Open on Windows
HEIC is the modern format iPhones use, and some Windows setups struggle with it. That's annoying, but it's fixable, and you have a few different ways to solve it depending on how much effort you want to spend.
According to Windows Central, you can install the HEIF Image Extensions from the Microsoft Store, and video may also need the HEVC extension. Sources disagree on whether the HEVC piece is free or costs about a dollar, so check the Store listing yourself. Or skip all of that and switch your iPhone to Most Compatible.
Duplicates and Missing Dates After Import
Nothing's worse than a folder full of repeats. Duplicates usually happen when you import the same photos twice, or when you mix a cable import with a cloud download.
On a Mac, Apple's Photos import offers Import All New Photos, which skips items you've already brought in. On any computer, pick one main method and stick with it. Then sort your library into folders by year and month so it stays easy to browse.
Protect Your Photos With the 3-2-1 Backup Rule
Here's something most guides skip. Moving your pictures to a computer is only half the job, and a single copy on a single laptop is still a single point of failure.
What happens if your laptop dies next month? You'd be right back where you started. The smartest fix is a simple rule for every photo backup.
The 3-2-1 rule from CISA says to keep three copies of important files, on two different types of media, with one copy stored offsite. Photographer Peter Krogh popularized it in The DAM Book.
Here's what that looks like for you:
Copy 1: your computer
Copy 2: an external hard drive
Copy 3: cloud storage such as Google Photos, iCloud, or OneDrive
Frequently Asked Questions
What is the easiest way to transfer photos from phone to computer?
The easiest way is a data-capable USB cable. Unlock your phone, connect it, and use the Photos app to import on Windows or Mac. On Android, choose File Transfer mode and copy the DCIM folder. Cloud backup is the easiest cable-free option.
How do I transfer photos from iPhone to PC without iTunes?
Install Apple's Devices app from the Microsoft Store, connect your iPhone, tap Trust, and open the Windows Photos app. Click Import, choose your iPhone, and select your pictures. Apple's current transfer guide for Windows uses these tools.
Why won't my computer recognize my phone?
The usual causes are a charge-only cable, a locked phone, or a missed Trust prompt. Try a different cable and USB port, unlock the phone, tap Trust or Allow, and update your phone's software. If it still fails, test another computer.
How many photos can I download from iCloud at once?
Apple says you can select up to 1,000 photos or videos at a time on iCloud.com. For larger libraries, use iCloud for Windows, or download the originals to your iPhone and import them with a cable.
Why won't HEIC photos open on Windows?
HEIC files need codec support in Windows. Install the HEIF Image Extensions from the Microsoft Store, and note that videos may need the HEVC extension. You can also set your iPhone to Most Compatible so it shoots JPEG instead.
Can I transfer photos to a computer wirelessly?
Yes. Use AirDrop between Apple devices, Quick Share between Android and Windows, or cloud services like iCloud, Google Photos, and OneDrive. Wireless methods suit a few pictures, while cables are usually faster for very large libraries.
Final Thoughts on How to Transfer Photos to Computer
You now know how to transfer photos to computer using seven different methods. Pretty cool, right?
My quick recommendation: use a cable for big batches, AirDrop or Quick Share for a few pictures, and cloud backup so it all happens automatically. Then verify your copy, and follow the 3-2-1 rule, so one broken device never wipes out your memories.
Pick one method today and try it right now. Your future self (and your phone's storage) will thank you.

![What Is a Telephoto Lens? The Complete 2026 Guide | [Brand]](https://contiocdn.com/efdc9a99-5ac4-4f75-be3a-ed43de859d76/blog-covers/1787138653893-ru50banq-what-is-a-telephoto-lens--the-complete-2026-guide-.webp)